


N-1wsletter #12: Your suspension is begging for love, tougher carbon mountain bike wheels, and the best pump head you’ll ever use
The saying still holds that you don’t get something for nothing.

Featured in this week’s tech round-up:
Ignoring your suspension service will only cost you more – way more – later.
Campagnolo changes things up with its latest road wheelset.
Hunt toughens up.
Purple inner tubes!
A pointless – but also kind of pointless fun – upgrade for your SRAM Transmission derailleur.
Maybe two is better than one after all?
The best Presta inflator head I’ve ever encountered.
Wax on, wax off.
Mmm… English muffins.
A good friend of mine recently experienced the joy of New Bike Day – in her case, a shiny trail bike with a carbon fiber frame, a little more travel than her old bike, familiar geometry, an impressively low weight, and a sleeker profile with substantially more ground clearance than her previous bike (a particularly good thing given her propensity to land directly on big, pointy rocks).
But one of my friend’s favorite things about her new bike? “Working suspension – wow!”
My friend had had her old bike for about 4 1/2 years, and seeing as how she’s the quintessential “ridden hard and put away wet” person when it comes to bike maintenance, it’d led a pretty hard life. That said, she insists she was “reasonably diligent” in terms of having the fork and rear shock serviced, including multiple full overhauls and even installing a brand-new rear shock just a couple of years ago.
But was she really?
Manufacturer-recommended suspension service intervals can seem unrealistically aggressive – often as frequent as just 50 hours of riding for basic service (i.e. refreshing the oil bath and cleaning the seals on either a conventional fork or rear shock). For particularly avid riders, that could mean a basic service every month or so (plus more in-depth full overhauls at longer intervals).
Given how much my friend rides during the season, her fork and shock should have had at least a basic service about every six weeks. Is that practical? If you’re paying someone to do the work, then yeah, it not only gets expensive fast, but we’re also talking about your bike spending a lot of time at a shop instead of on the trail. That’s obviously not super appealing when conditions are perfect and you’re trying to cram in as much riding as your busy life will allow.
Let’s make the assumption those manufacturer recommendations are wildly conservative, and you push it out to, say, three times that. If you ride 8-10 hours per week, that still ends up working out to about twice a season for basic service.
So what did my “reasonably diligent” friend do? She said she missed the first season entirely, but then had a full overhaul done each year afterward. That’s better than what most people do, but still at least half as often as it should have been.

Suspension components don’t usually fail dramatically; their performance slowly degrades over time to the point where they just don’t work well anymore and you’re left wondering why your bike doesn’t feel like how you remember it. You start making weird mistakes, you crash more, you’re not having as good a time as you used to. Eventually you decide that maybe it’s time for a new bike, that new bike feels great, and the cycle repeats.
“The need for regular suspension service is a really interesting topic because of all the situational factors that can contribute, but I like to break it down to performance degradation and damage to parts,” said professional mechanic Colin Williams of Sports Garage in Boulder, Colorado. "It’s really important to understand how your suspension should feel when it’s working correctly and check in with it every few months. If you start to hear new noises, notice compression and or rebound doesn’t adjust correctly, or there is more frequent bottoming out or hitting pedals, it’s worth seeking a professional opinion.
“I think the manufacturers service intervals should be thought of as guidelines but definitely not something to ignore,” he continued. “Frame designs and condition can also play a massive role in shock longevity. Frames with trunnion, yoke, and extender style shock mounts can allow misalignment of the shock mounting points. These designs usually allow tighter packaging for bottle clearance or stand over so they have real benefits, but I see more problems with shocks on these designs than others so I would make sure to stay on top of the service intervals more carefully on them.”
I get it; no one wants to stop riding, even if it’s just for a few days, and especially if that pause also comes with a hefty service bill (a full overhaul on both a fork and rear shock can easily run about US$350). But unless you fully intend to pass your problems on to some unsuspecting victim if/when you sell your old bike (in which case you’re just a bad person), you’re only hurting yourself by pretending you can get away with it. And if you do actually want your mountain bike to work the way it should, then you’ve got to pay the piper and keep up with the suspension maintenance.
Think of it another way: a basic lower leg service is usually less than US$100 (and I can promise you that if it’s been a while since that was last done, even just that can make your fork feel worlds better). But if you have to buy even a new mid-level fork because you neglected your old one all the way to its grave, you’ll be out about US$600 (plus labor). And let’s not forget that like-new performance wears off quickly, and then you’re right back where you started – only much poorer this time around, particularly if we’re talking about a whole new bike.
Also, Williams is quick to remind people that just because a fork is new doesn’t mean it’s in tip-top shape, either.
“This is going to be an unpopular opinion, considering the price of new forks, but I think the first service on a fork is the most important one,” he told me. “I recommend a basic lower leg and air spring service, without the need to replace any seals, but to ensure oil levels are correct, foam rings are soaked, air spring is properly greased, and footnuts are properly torqued. It’s rare to open a new fork from a major brand these days and find all of these points properly addressed.”
Point being: don’t fool yourself into thinking it’s fine to let your suspension maintenance lapse because it “feels fine” – because in all likelihood, your stuff isn’t working as well as you think it is. The sad reality is that modern mountain bikes aren’t just expensive to buy, but they can also be expensive to maintain. And if you insist on running the good stuff but are still stubbornly resistant to handing your precious rig off for even basic service, then at least invest in the tools, materials, and knowledge you need to do it at home (doubly so if you don’t have the luxury of a good mechanic nearby).
Basic fork and rear shock service isn’t hard, nor does it require much (YouTube and manufacturer-supplied service manuals are your friends here). I don’t bother with full overhauls myself, but basic service on both a fork and rear shock can be done in less than half an hour with simple tools once you know what you’re doing. And after you become familiar with how your stuff should feel, it’s a lot harder to put up with anything less than that.
I’m genuinely excited for my friend’s New Bike Day. But I also wonder how well her old bike might still feel had the suspension been better cared for – and how much money she could have saved in the process.
Pay now or pay later, whether in time or money. Which one you choose is up to you, but we all pay eventually.
In the news
Campagnolo does the two-step with new Shamal carbon road wheels
Campagnolo is getting fancy!
Its latest Shamal carbon road wheels feature a new-to-Campagnolo stepped aero rim profile that varies in depth from 40 to 45 mm. Campagnolo hasn’t adopted this profile to reduce aerodynamic drag, but as with similarly stepped road wheels from Princeton CarbonWorks and Fulcrum, the idea is to improve crosswind stability for more confident handling in blustery conditions.
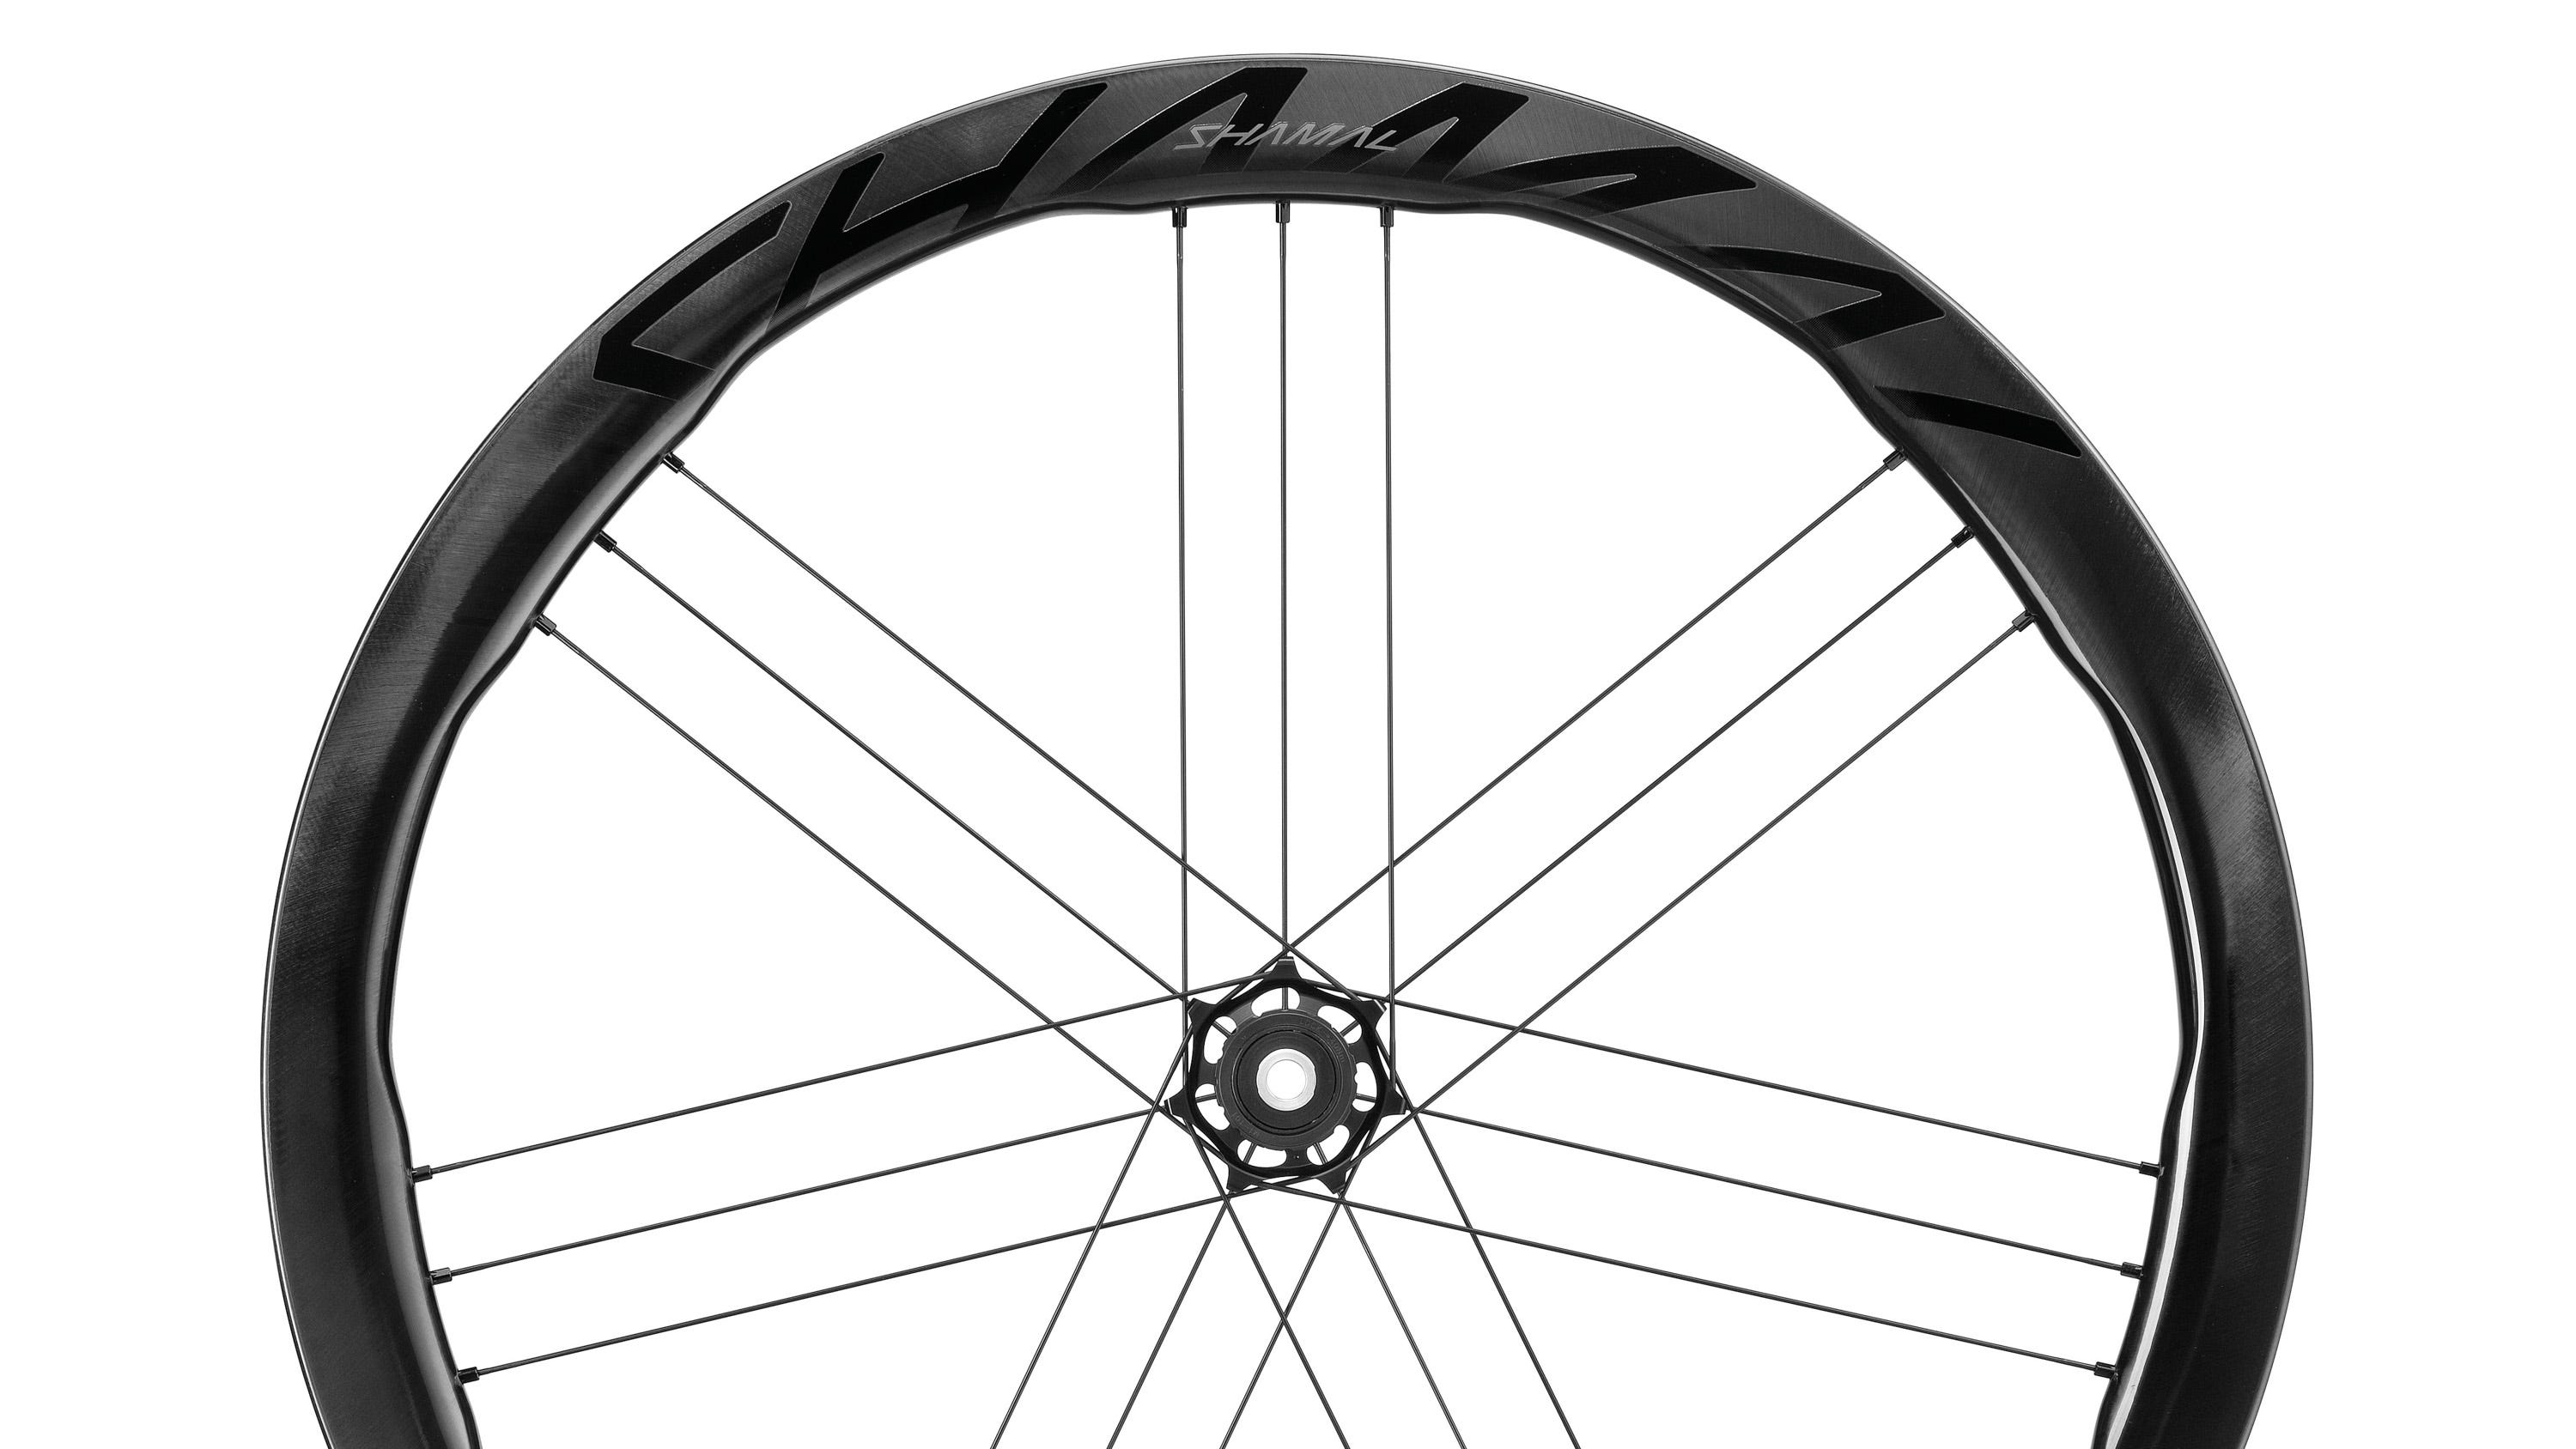
Although the Shamal has historically been a dedicated road wheelset, Campagnolo is clearly aiming for a little more versatility this time around, even specifically mentioning “gravel” in the press pack. The inner rim width is fairly generous at 23 mm, it’s tubeless-ready (or not, should you prefer inner tubes), and the hooked rim profile offers a wide selection of compatible tires.
Several other Campagnolo hallmarks are included here, too, including the company’s G3 two-to-one spoke lacing pattern (with bladed stainless steel spokes and exposed nipples), adjustable cup-and-cone hub bearings, and solid outer rim walls that require no rim tape for an airtight seal. Campagnolo has also graced the new Shamals with its gorgeous high-gloss “C-LUX” finish, which truly does look spectacular in person.

Claimed weight is respectable at 1,480 g per set, and while I’m not sure I’d say €1,900 for a pair of carbon road wheels represents “good value for money” as stated in the marketing materials, that’s nevertheless pretty reasonable for carbon wheels from Campagnolo.
Hunt focuses on impact resistance with new Proven Carbon Trail mountain bike wheels
Hunt Wheels has just announced a new mountain bike wheelset that sounds promising if you’ve historically had rough luck keeping carbon wheels in one piece. The new Proven Carbon Trail wheels don’t incorporate anything revolutionary in terms of dimensions, rim shape, or materials, but at least according to Hunt, one tweak in the manufacturing process makes all the difference in terms of impact resistance.

Hunt says that one area of the rim that’s most susceptible to impact failure isn’t right at the outer edge, but rather the intersection between the tire bed and sidewall. To improve strength at that critical location, the company is incorporating a new technology called H_Core whereby two pultruded (like extrusion for metals, but for fiber-based composites) solid carbon fiber rings are embedded inside that junction, and then the rest of the rim is built around them before being compressed and cured in the molds.
According to Hunt, those pultruded rings reduce the likelihood for porosities since it’s otherwise difficult to get enough compression during the curing process with that sort of geometry. And since porosities in carbon fiber structures are weak spots where cracks can initiate, the claim is that the new Proven Carbon Trail wheels can handle more abuse without coming apart.

The cross-section of the rims looks promising, too.
Hunt is using front- and rear-specific profiles, both with shallow 22 mm depths (for compliance and grip) and 38 mm external widths. The front gets a slightly wider 31 mm internal width to yield a subtly more squared-off tire profile for more cornering traction, while the rear measures 30 mm between the sidewalls. Hunt claims the narrower rear reduces rolling resistance, which is perhaps true in theory, but seems like it’d be such a minute improvement that it’s entirely unnoticeable (perhaps even unmeasurable). The bigger benefit is likely the thicker sidewalls (4 mm instead of 3.5) and the slight increase in material volume for more impact strength (the rear rim is about 20 g heavier than the front).
Hunt is pairing those rims to its own S_RapidEngage aluminum hubs. The rear hub features a speedy 2° engagement courtesy of a 90-tooth ratchet ring and six individually sprung steel pawls arranged in two offset trios. Each wheel is built with 28 Pillar triple-butted stainless steel spokes, with the rears getting 1.7 mm-diameter center sections and the fronts featuring thinner and lighter 1.6 mm ones. Interestingly for a wheelset ostensibly built primarily for strength and durability, aluminum nipples are used all around.

Claimed weight is 1,732 g for a set of 29ers (794 g front, 938 g rear), or 1,719 g if you’re after a mullet. There is no 27.5” front option, FYI, although buyers do get a choice of bright white or “stealth black” clearcoated graphics.
Retail price is US$1,500 / £1,200 / €1,450, including Hunt’s lifetime free crash replacement policy.
Yet another TPU inner tube option – this time in purple
Panaracer apparently doesn’t want to be left out in the cold when it comes to TPU inner tubes, as it’s recently announced its new Purple Lite range for road and gravel bikes.
These feature presumably the same thermoplastic polyurethane material as other TPU inner tubes, though with stems that are not only aluminum, but also threaded so you can use the included valve nuts and spacers should you desire a more secure fit to the rim.

“The valve stem itself is metal, but there is a plastic joiner sleeve at the bottom because metal can’t be bonded to the TPU material,” explained Jeff Zell, Panaracer’s Global Go-To Guy (yes, that’s his official title). “The valve stem is bonded into the plastic sleeve down to the reinforced part of the plastic sleeve, about 95% or so of the way down. Because the sleeve is reinforced at the point it's joined at the tube, it’s quite secure.”
Claimed weight for the road version (700x23-32 mm) is 36 g, while the gravel version (700x32-47 mm) is a smidgeon heavier at 45 g. Both are offered with 65 or 85 mm-long valve stems.
Retail price is US$25-26, depending on size.
A fun and frivolous upgrade for your SRAM Transmission rear derailleur
Terske doesn’t make any illusions as to why you might want to swap your stock steel hardware for shinier titanium stuff: “Look good, feel good” says the header on its web page. Two thumbs up for transparency.
Recently added to the collection are seven-piece kits for SRAM Transmission rear derailleurs that replace the stock pulley bolts, main parallelogram body hardware, and shifter pod clamp bolt. Offered in four different colors (black, natural, gold, and oil slick), Terske playfully claims its kits are “up to 45% lighter and infinitely better looking than stock,” while also pointing out that we’re only talking about 4-5 g or so in total. That said, a close-up look does at least reveal deeply broached (and sharp!) 2.5 and 4 mm hex-head sockets for what I hope is improved tool purchase.

Regardless, Terske at least isn’t charging an arm and a leg for these, so if your only goal is to visually dress up your Transmission derailleur a bit – and no harm in that, of course – it’ll only cost you about US$25.
Terske does have other hardware offerings that seem more practical, such as low-profile water bottle cage bolts. There are also these stainless steel “blanking” screws that are designed for unused accessory mounts, replacing the protruding heads with flush ones that won’t snag your clothing or other gear. Surely there’s still one more race left in your local ‘cross season, no?

Allied Cycle Works slims down the BC40 and introduces a new MTB cockpit
Lots of news coming out of Bentonville, Arkansas-based bike brand Allied Cycle Works this week.
On the racing side, Allied just announced that it’ll be the bike sponsor for American racer – and former UCI XCO World Champion – Kate Courtney’s new solo program, She Sends Racing. Courtney will spend next season on Allied’s versatile BC40 full-suspension model, which Allied says just dropped 100 g for a more competitive 1,850 g claimed frame weight.

Further helping to shed some grams is Allied’s new Duet mountain bike cockpit. While a growing number of brands have introduced one-piece carbon fiber setups, the Duet stands out because it’s an ultralight two-piece design with a separate bar and stem for more adjustability. Moreover, while the flat bar is carbon fiber, the stem is aluminum. Despite the mixed materials, the claimed weight for the combo is a paltry 199 g, with the bar coming in at just 135 g and the stem tipping the scales at a barely-there 64 g.
If the flat bar didn’t already give it away, Duet is quite clearly intended for XC racing (though given how burly UCI World Cup courses are these days, I’d imagine it’d also be fine for most folks’ “trail” riding). The stem boasts a minimal CNC-machined design with an old-school bar clamp that does without a removable faceplate to save weight, plus titanium hardware is used throughout. Quite cleverly, a K-Edge computer puck screws directly into the upper surface of the stem for an ultra-minimalist setup that weighs just 3 g.

While Duet might very well be strong enough for more everyday riding, the dimensions will probably be the more limiting factor. Allied is offering the stem in 50, 60, and 70 mm lengths, but only in -6° angles. The clamp also seems suited only to flat bars, not risers, and my guess is many riders will trim a fair bit from the stock 780 mm bar width.
Retail price for the Duet combo is US$325.
Ceramicspeed unveils the SRAM DUB product you definitely didn’t expect
Maybe I’ve saved the best for last?
So earlier this week I wrote about a solution for those incredibly stubborn SRAM DUB crank bolts that only adds 13 g of weight and costs a paltry US$13. But if you’re hellbent on sticking with that pesky aluminum crank bolt – and are maybe looking for an excuse to buy a new tool – well, this is your lucky day.
Ceramicspeed has come up with a novel device specifically engineered to tackle the often-ridiculous breakaway force required to undo those bolts (or any 8 or 10 mm crank bolt, for that matter). I haven’t tried it myself – haven’t even seen it in person yet, in fact – but it’s pretty clear how it works. It features a custom hex wrench, a special fitting that replaces the driveside pedal, and a threaded rod that gradually pulls the end of that wrench toward the crankarm end until the bolt says “uncle”.
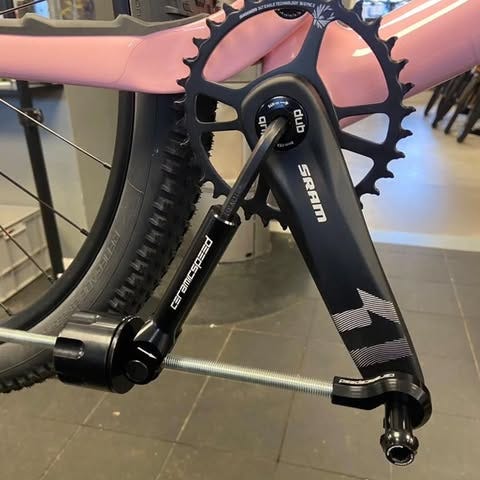
Retail cost is US$145-225, depending on options.
It looks neat, and kudos to Ceramicspeed for being so clever. That said, I’d still argue this tool shouldn’t need to exist.
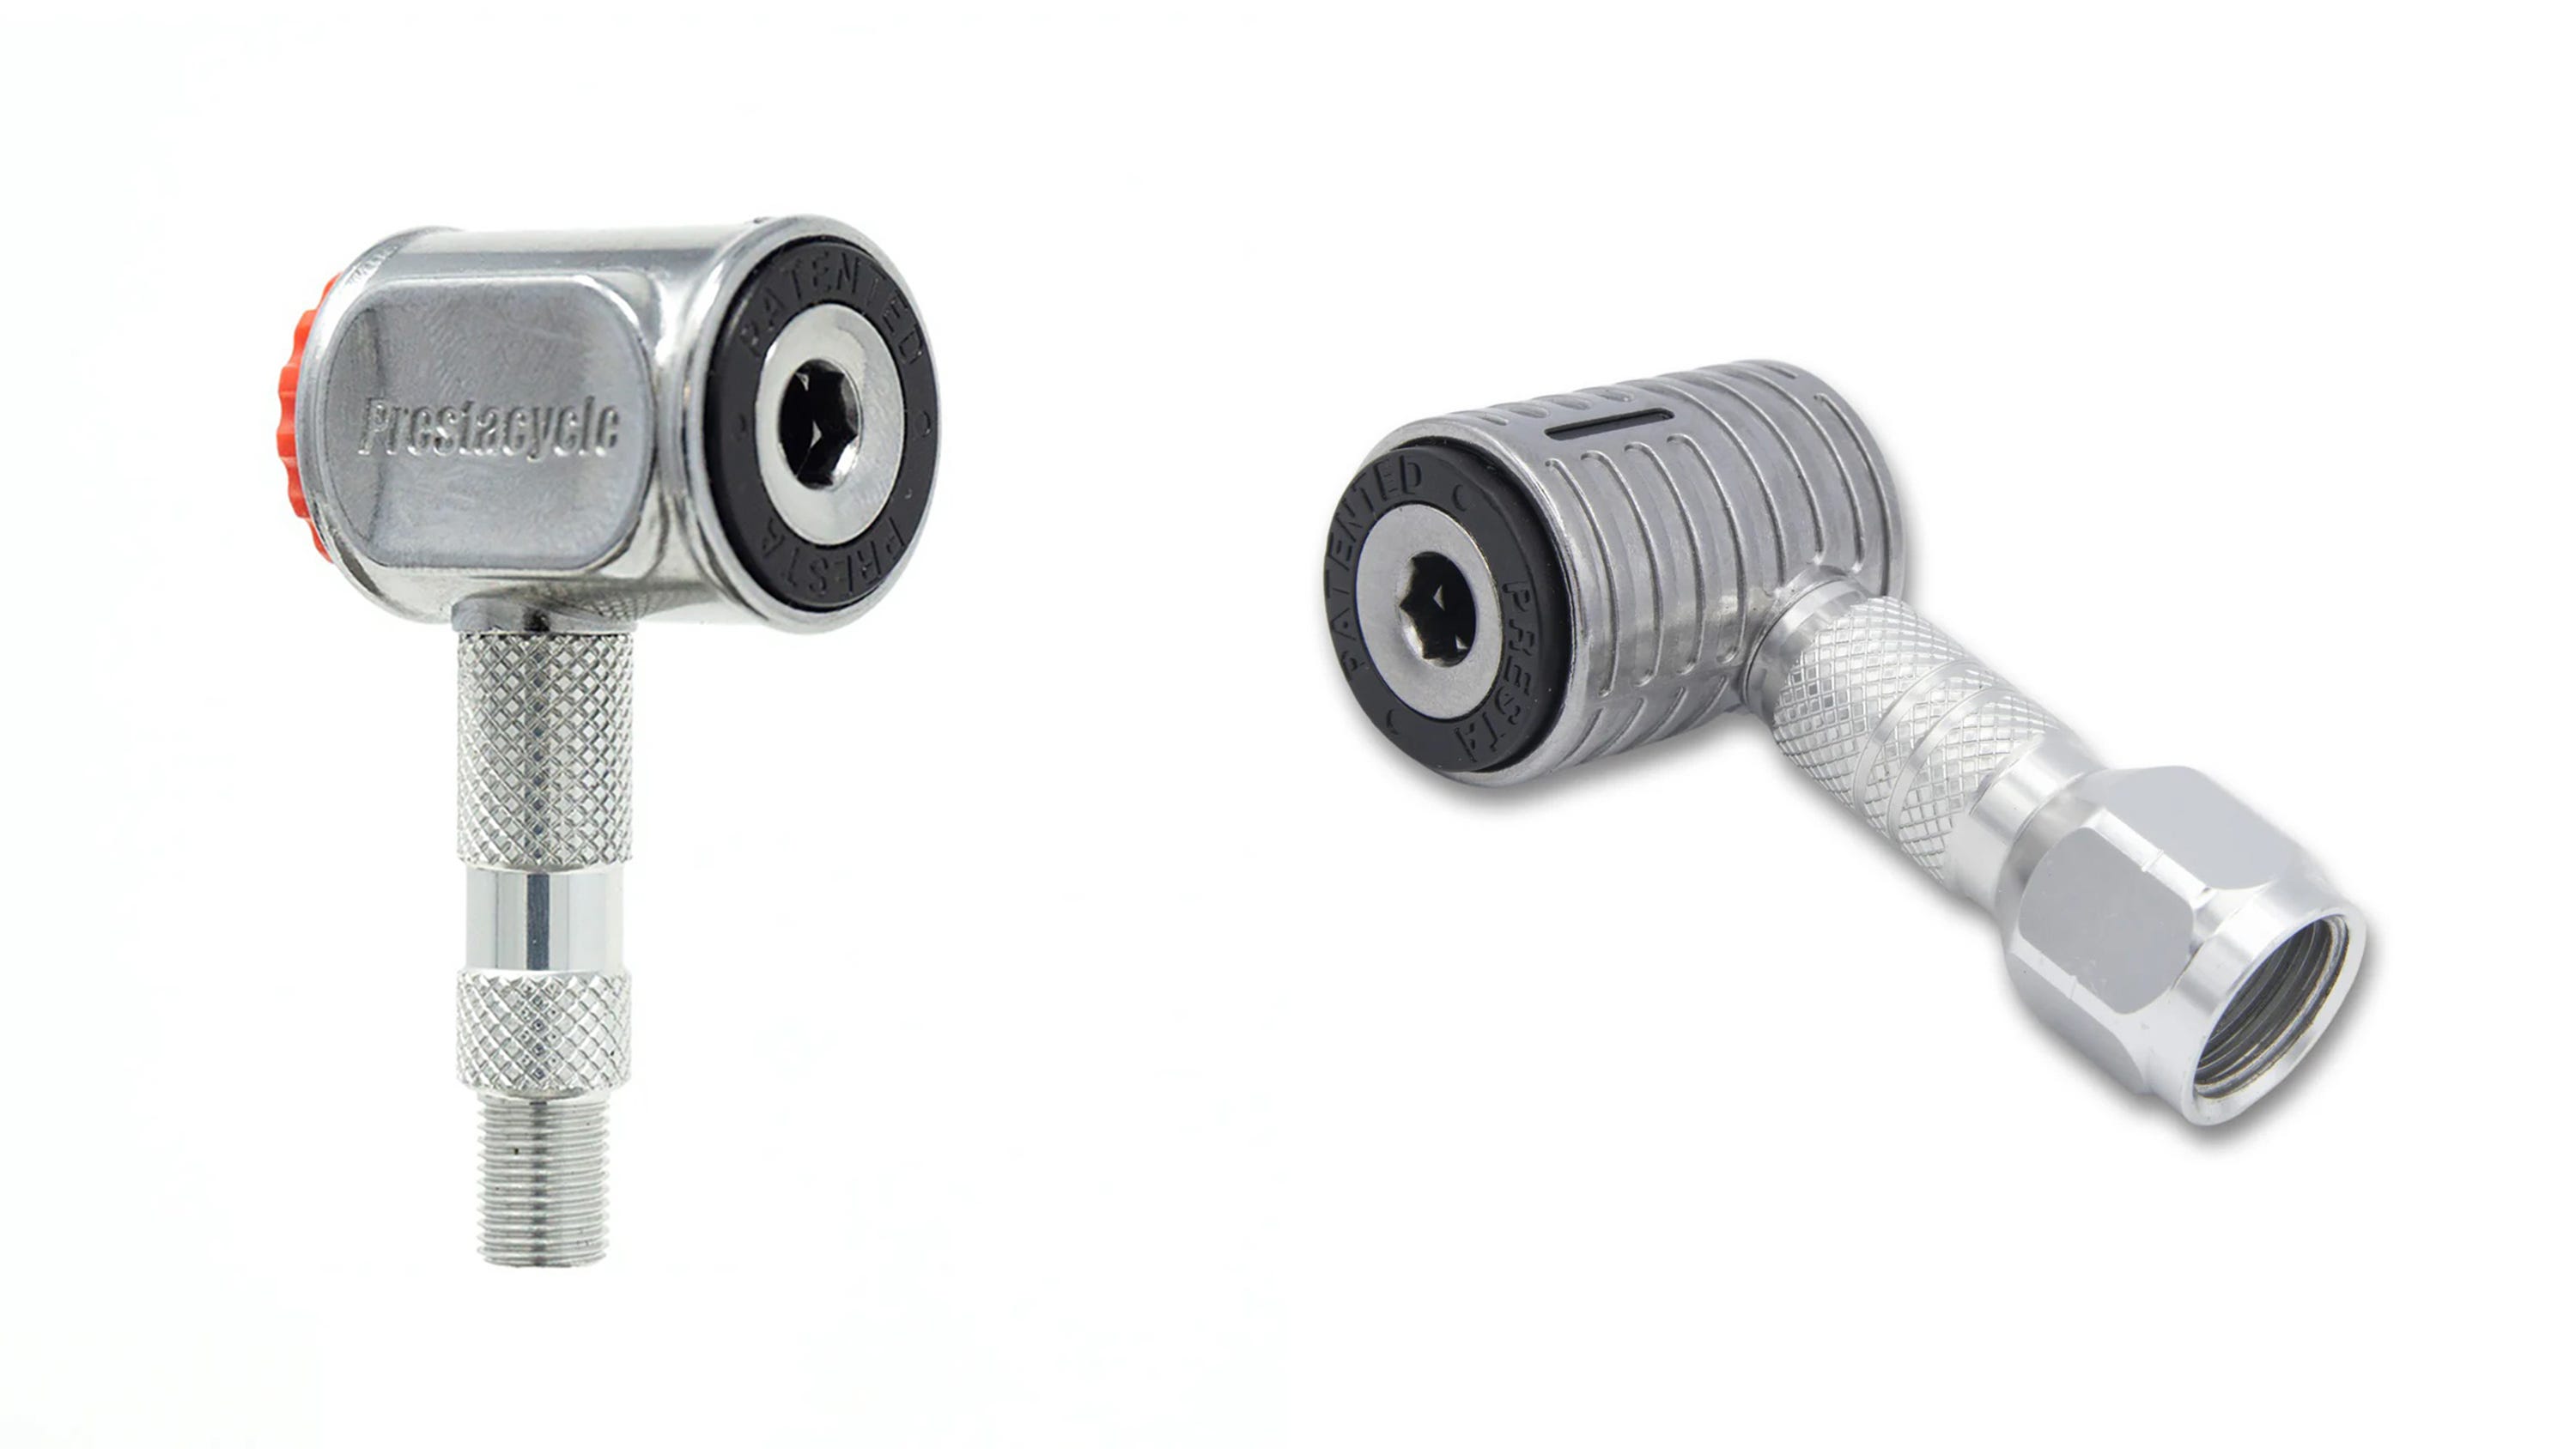
TL;DR review: Prestacycle Pro Presta Head
I couldn’t begin to guess how many different floor pumps I’ve used over the years – not just as a tech editor, but as a cyclist in general. The variety – and effectiveness – of the included inflator head sticks in my mind especially. Some were very good (Silca Hiro), some offered interesting features (Topeak TubiHead), some were flat-out terrible (Lezyne’s older thread-on design). Mostly, though, they were pretty meh.
But this Prestacycle Pro Presta Head? No joke, it’s the best I’ve ever used, and by a wide margin.

First off, it’s incredibly easy and intuitive to use. Just push the head on to the valve, and an internal ring of little metal jaws lock it in place. To remove, you push the (rather obvious) big red button on the back with your thumb to release the lock, and then pull off the head. That’s it.
Aside from the usual unscrewing and screwing of the Presta valve core itself, there’s nothing to figure out, and – particularly as compared to most push-on heads – almost no effort required. It’s truly a one-handed operation.

Provided you’ve got at least 10 mm of valve stem exposed, the head seals well, too, even if that exposed stem isn’t completely threaded. And on more unusual valves like the Reserve Fillmore? Also no issues whatsoever.
It even works and almost looks like new with no leaks and no loosening or jiggling of any parts after more than nine months of near-daily use – pretty impressive for US$40.
It’s not without its quirks, though they’re quite minor.
Prestacycle designs the Pro Presta Head so that it screws on to a Schrader fitting. This was no big deal with my trusty Silca SuperPista Digital floor pump (which already has a Schrader fitting on the end of the hose), but replacing your original head with something like Prestacycle’s own Schrader Hose Barb will likely make for a tidier installation while still offering Schrader compatibility for the occasional topping-up of car tires and whatnot.
Savvier shoppers might see a rather remarkable resemblance to another product, the Jaco Lightning XP. Both brands deny any formal association with each other (yes, I asked), but both clearly use the same inflator head guts and share the same basic features. The Jaco’s configuration is a little different as it’s primarily designed for a standard NPT pneumatic fitting, though its modular design also allows it to attach to a threaded Schrader head.
Is one better than the other? I unfortunately can’t determine that myself as I’ve only had the Prestacycle one on hand. That said, the Prestacycle configuration strikes me as a bit more convenient for bike use, but if the Jaco suits your particular setup, it’s a few bucks cheaper.
Whichever way you go, chances are high it’s better than what you have now.
Tech tip of the week
I’ll keep this week’s tech tip short and sweet since the last few newsletters have gotten awfully long.
Wax chain lubes have clearly gained immense popularity in recent years, so much so that I wish I’d bought stock in a crockpot brand. Drip wax lubes have also gotten much better in the last few years, to the point where I only bother with immersion waxing every month or so, supplementing in the meantime with a top-end drip like from Silca, CeramicSpeed, or Effetto Mariposa (I still use Squirt on occasion, but it’s a little messier).

But whereas hot-melt wax treatments are ready to go only a few minutes after pulling the chain out of the pot because the wax solidifies so quickly, drip lubes use solvent carriers that are much slower to evaporate. And so here’s the tip: If you’re going to supplement with drip wax, get into the habit of re-applying it right after you finish a ride, not when you’re getting ready to roll out. That wax needs time to penetrate the links and dry out in order to work properly, and applying it in a rush as you’re trying to meet up with your buddies will just leave you with a goopy mess that’ll be way more of a pain to clean up later – not to mention counterproductive given the whole point of using wax to begin with.
As Benjamin Franklin supposedly said (I guess he wasn’t a fan of the metric system), an ounce of prevention is worth a pound of cure.
In the works: David vs. Goliath 3D-printed saddle head-to-head
If you’ve been following along with my journey here on Substack, you’re likely familiar with my growing fascination with Aliexpress. Though the experience can certainly be a little hit-or-miss (for example, I just had an order refunded after the shipment was inexplicably deemed “undeliverable”), there are also some incredible deals to be had. However, the marketplace is also chock full of copycats, and sometimes even full-on counterfeits.
The saddle I’ve just ordered for myself seems to occupy some grey area in between all of that, and I’m pitting it head-to-head against an established heavyweight.

In one corner, we have the Ryet Ultra 3D saddle, a full-length design that features a 3D-printed top with “differentiated cushioning zones”, 150x255 mm dimensions with a generous central cutout, a molded carbon fiber shell, molded 7x9 mm carbon fiber rails, a 120 kg rider weight limit, and a one-year warranty, all with an enticing 183 g actual weight and a shockingly low retail price of just US$75 – including international shipping.
In the other corner, we have the Selle Italia SLR Boost 3D Kit Carbonio Superflow, the iconic Italian saddle brand’s latest-and-greatest full-length model, boasting a 3D-printed top with “differentiated cushioning zones”, 145x248 mm dimensions with a generous central cutout, a molded carbon fiber shell, molded 7x9 mm carbon fiber rails, no rider weight limit, and a one-year warranty. Actual weight is 174 g, and retail price is a heady US$480.

Before you all send me emails pointing out that I’ve mistakenly repeated myself in the previous two paragraphs, that was no mistake. Those two saddles not only sport curiously similar features and dimensions, but their overall appearances and shapes bear so much resemblance to each other that it simply couldn’t have happened by accident.
Let me be clear: theft sucks. And whether Ryet would openly admit it or not, it doesn’t take a patent lawyer to come to the conclusion that something unethical has happened here. But jeez, we’re talking a difference in cost of more than 6x, and last I checked, most of us aren’t made of money.

Even if you can look past the ethical issues at hand here, that Ryet saddle can’t possibly be just as good as the real thing, can it? But if it is, what does that say about the Selle Italia?
Winter has finally hit for real here in Colorado so this one may take a little while for me to work through, but needless to say, my curiosity is piqued.
ICYMI
Thermoplastic has become quite the buzzword when it comes to carbon fiber composites thanks to its potential recyclability and reduced waste, improved impact resistance, and increased vibration capacity as compared to traditional thermosets. Not surprisingly – and largely due to the capabilities of Utah-based manufacturer CSS Composites – the technology has gained a firm foothold in the cycling rim and wheel market.
That extra toughness has been welcomed with open arms in the mountain bike space where buyers have clearly been willing to accept the slight penalty that comes with thermoplastic technology vs. thermosets, but does that also make in the road and gravel world?
Based on my experience with the Bontrager Aeolus Pro 49V, I’m not so sure (fair warning: that review is only available in full to paid n-1 subscribers).

Recipe of the week
As some have requested, I’m capping off this week’s newsletter with the recipe I use for sourdough English muffins. These are a favorite in my household, either fresh off the griddle or toasted with butter, Nutella, or avocado (not all at once, of course) – and I have to admit they make pretty incredible breakfast sandwiches, too.

I’ve tweaked the above recipe a little after a fair bit of trial and error. I use a stand mixer instead of incorporating everything by hand (I feel like it mixes more evenly), I increase the flour to 280 g per batch so the dough is less goopy (I generally use AP flour, FYI), and I roll the dough out to a thickness of about 10 mm. And despite what the recipe calls out, I haven’t had any issues with twisting my cookie cutters (though I also use stainless steel ones that are fairly sharp).

I cook these on an electric griddle set to about 150°C (300°F), and I use butter instead of olive oil. They take a few minutes per side at this temperature, but I like how the muffins get perfectly cooked all the way through without making either side too crusty (adjust as needed depending on how big and/or thick you make yours).
I promise you’ll never buy English muffins from the store ever again.
And that’ll do it for another n-1wsletter! Twelve down, and hopefully a whole bunch more to go. If all goes well, I’ll have my review of the Mondraker Arid gravel bike ready for you after the weekend. See you all in a few days.
I use the app "ProBikeGarage" to track maintenance intervals. It works really well assuming you track your rides with Strava.
Freshly serviced fork and shock day feels like new bike day every time! Easily the best money I spend on my bike. I really need to look into doing the basic service myself.